Name Yellow Poplar
Location Eastern North America
Texture/Grain Medium/Closed
Specific Gravity 0.42
Hardness Soft
Strength Medium
T/R Stability
8.2/4.6%


Guide

Woodworking
Know-How

Woodworking
Techniques

 Up     

Jointing & Planing

1. Selecting Lumber
 for Surfacing

2. Jointing Know-How

3. Planing Know-How

4. Using a
Hand Plane

(You are here.)

5. Truing Lumber

 6. Jointing &
Planing Resouces


Looking for
something?

Try these navigation aids:

  Site Map

Site Index

Search the
Workshop Companion

        
Something to share?
Please:

Contact Us!

lthough most contemporary craftsmen joint and plane on machine tools, hand planes are still useful for trimming, removing mill marks, and taking mild cups or twists out of boards that are too wide to fit on your jointer. Besides, few experiences in woodworking are more satisfying than planing with a well tuned bench plane. You just need to know a few simple tricks to make a hand plane sing for you.    

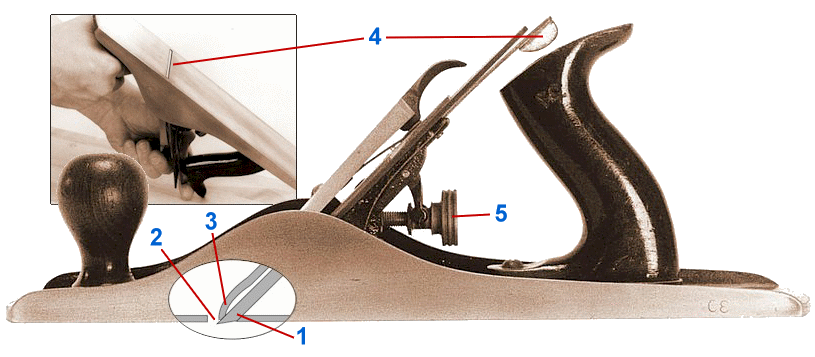
TUNING A HAND PLANE
1
 Sharpen the plane iron at 25 degrees for general work — a few degrees less if you work mostly with soft woods, a few degrees more for extremely hard woods or heavy-duty planing. A bit of tool-savvy: If there is a trick to using a hand plane, proper sharpening is 90% of it. The iron must be razor sharp and the cutting edge every bit as straight as the plane's sole is flat.

2  If the plane has an adjustable mouth, open it to 1⁄8 inch wide or more for rough cuts, 1⁄8 inch wide or less for fine cuts. You can also adjust it to control tear-out — close it down if the wood is tearing.


3  If the plane has a chip breaker, position it 1⁄16 inch or more from the cutting edge for rough cuts, 1⁄16 inch or less for fine cuts. You may also want to adjust it for the type of wood — more for softwoods, less for hardwoods.

4  Advance the iron until it’s flush with the mouth, and adjust it so the cutting edge is parallel to the sole.

5  Retract the iron into the mouth, then slowly advance it as you make test cuts on a scrap board. Stop when the plane is cutting paper-thin shavings the full width of the iron.
     

PLANING AT A SKEW
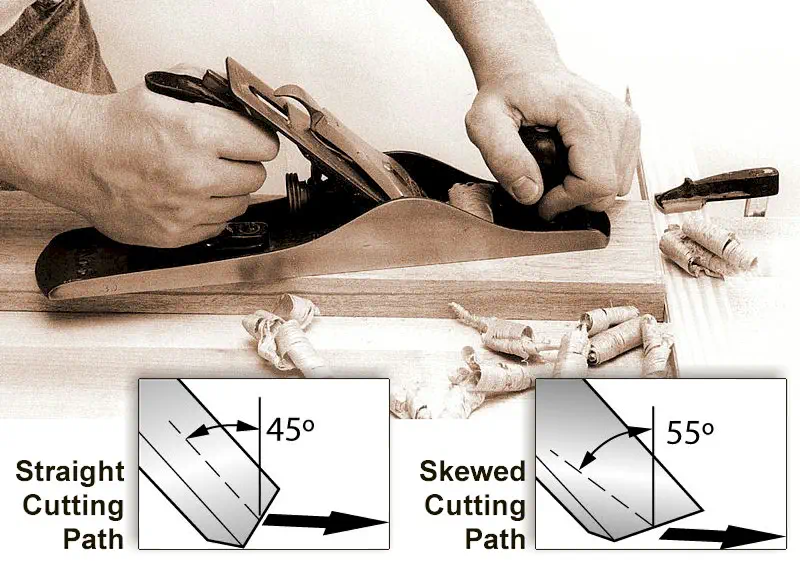
Keep the plane sole flat on the board as you cut. It’s easier to push the plane — and you’ll get a finer cut — if you hold the plane at a slight angle to its direction of travel. This effectively increases the cutting angle so the plane iron is shaving the wood from a lower angle. 
 
ROUGHING AND SMOOTHING
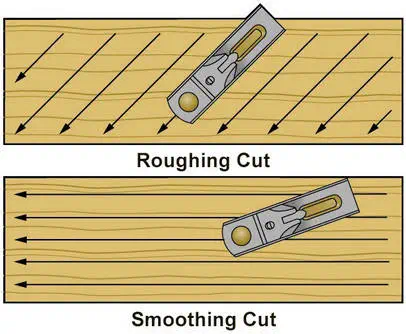
When you want to remove stock for a board quickly, plane at a steep diagonal to the wood grain. This is called a roughing cut, and it does not leave a particularly smooth surface. When a smooth surface is important, make a smoothing cut by passing the plane across the wood parallel to the grain.
     

PRECISION PLANING
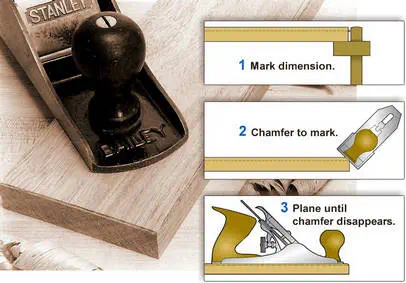
To plane a board to a precise dimension, mark all around the outside of the board. Holding the plane at an angle, chamfer the corners of the board down to the lines you’ve marked. Then plane the surface of the board until the chamfers disappear. A bit of tool-savvy: Use a variation of this technique to cut a precise chamfer. Mark the chamfer on both adjoining surfaces, and plane down to the marks.


CHECKING YOUR WORK
1
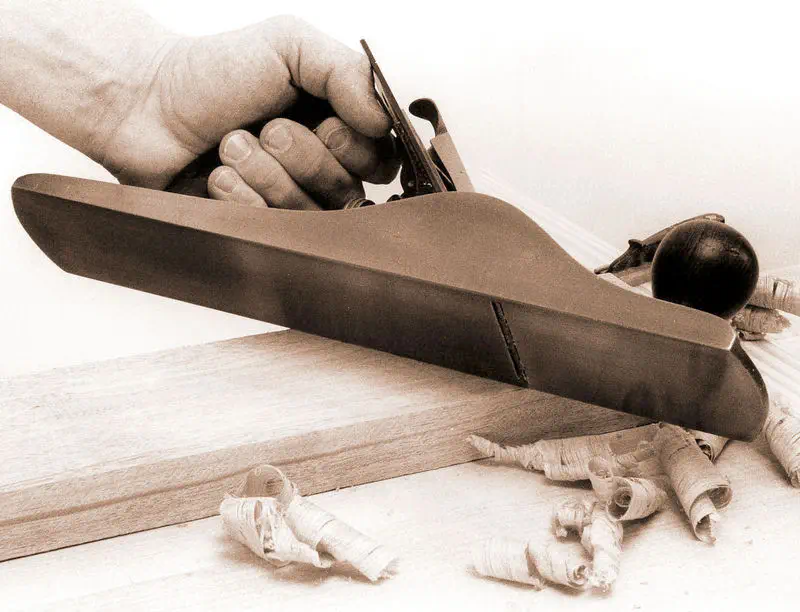
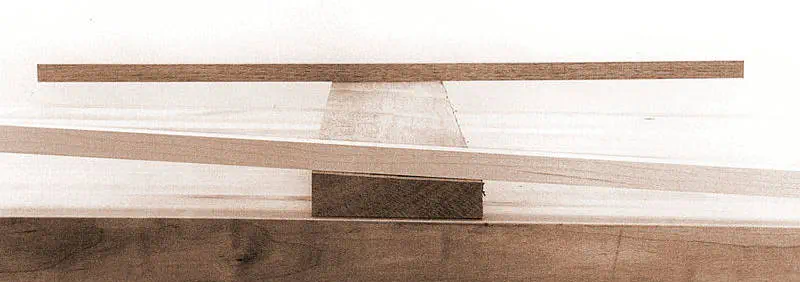
 To check that you’re planing a flat surface, use the edge of the plane as a straightedge

2  You can also sight along a pair of winding sticks to identify high and low spots and other distortions in the work.


Back to the top

*Indicates that you can enlarge a photo by clicking on it. To reveal the information in a "Superphoto," first enlarge it and then move the cursor over it.

 "Abundant to all the needs of man, how poor the world would be without wood."
Eric Sloane in Reverence for Wood


Woodworking Techniques/Jointing and Planing/Using a Hand Plane,
part of  the Workshop Companion,
essential information about wood, woodwork, and woodworking
necessary to woodworkers and practitioners of the wood arts
to become competent craftsmen.
By Nick Engler.

Copyright © 2009 Bookworks, Inc.