Sharpening Chisels & Plane Irons

The simplest tools to sharpen are those with straight cutting edges — flat chisels and plane irons. These tools have a bevel and a back. Initially, you must grind both surfaces, flattening the back and honing the bevel. But after the first sharpening, you need only sharpen the bevel.

chisel terminology - back, cutting edge, bevel

Straight & True

One of the most common sharpening mistakes is starting out with an abrasive that’s not coarse enough. Don’t use medium grits to remove nicks and chips, flatten surfaces, or change a bevel angle — it costs you extra work. And if you’re using a sharpening machine, the finer grits may overheat the tool.

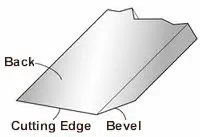
SHARPENING A STRAIGHT EDGE

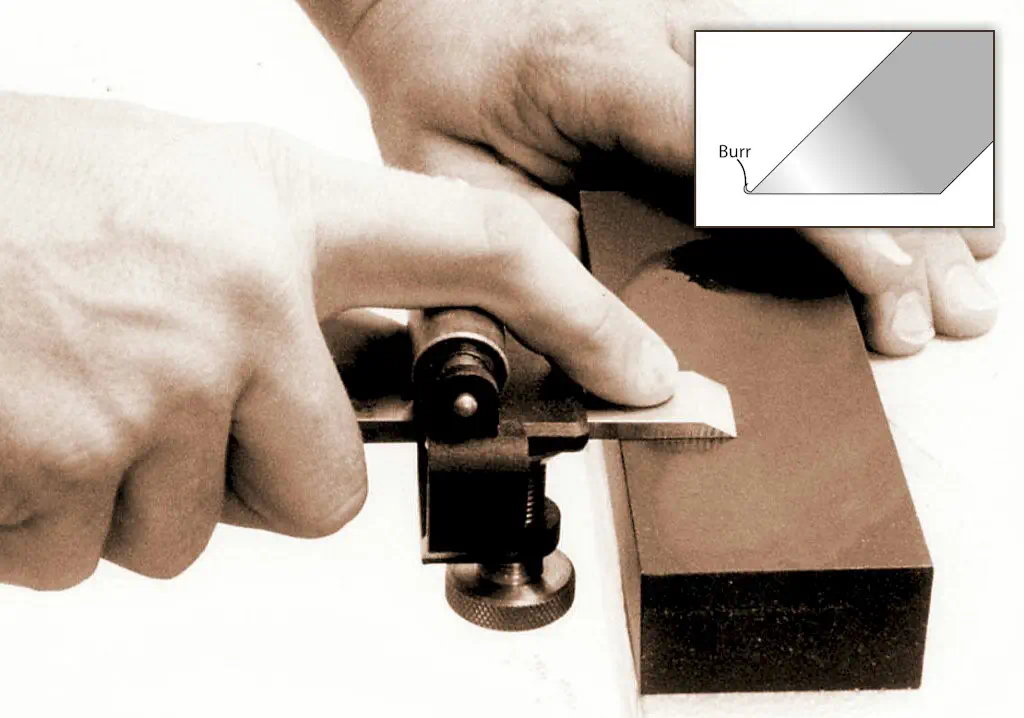
1- The first time you sharpen a chisel or a 
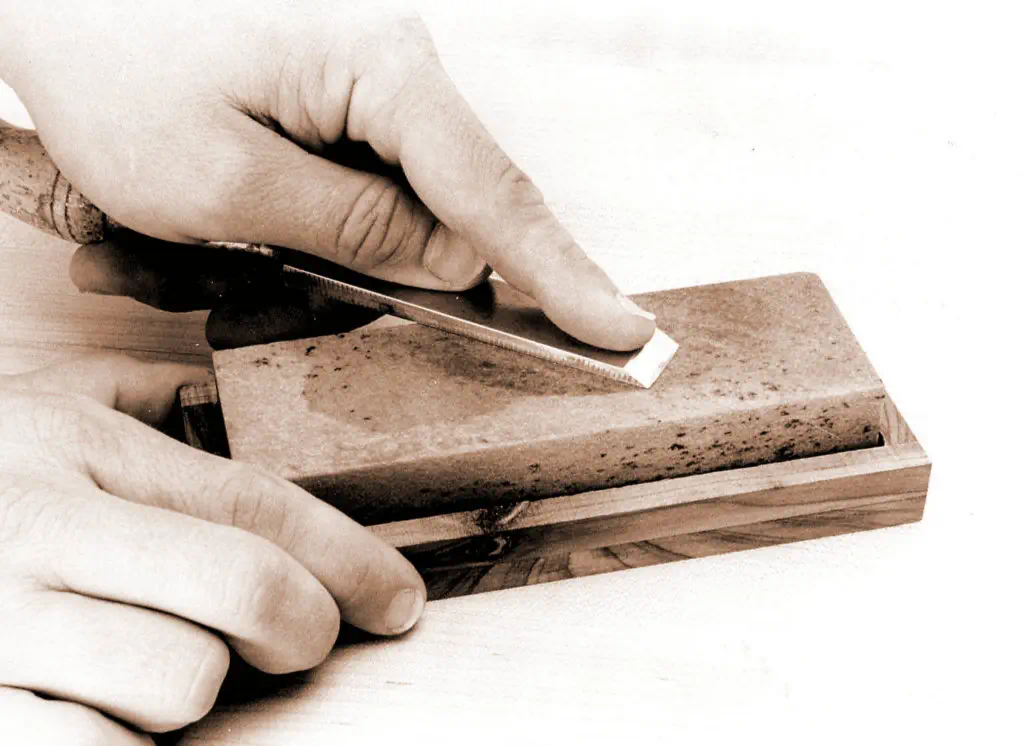
plane iron, flatten the back. Start with a coarse abrasive. Press the back against the stone and rub it back and forth until the scratch pattern covers the entire back. Work your way through finer stones, finishing the back to the same degree that you plan to finish the bevel. NOTE: Once the back is flat, there’s no need to grind it again. In fact, you shouldn’t touch it except to briefly rub it across a fine stone or strop to remove burrs. If you grind the back each time you sharpen the chisel, the blade will grow thin and fragile.

Flattening back of chisel

2- Mount the chisel in the tool holder or honing guide so the bevel rests against the abrasive. If you want to grind the bevel to a new angle, set that angle with the aid of a protractor. If you want to maintain the current bevel angle, set the tool so the bevel is flat on the stone. Make a few passes across the stone and inspect the bevel. If just the tip is scratched, the angle is too large. If just the heel is scratched, it’s too small. When the entire bevel is scratched, the angle is right on the money.

How a chisle should look if you get the bevel angle correct

3- Start with a coarse abrasive and grind the bevel until the cutting edge appears keen and straight, and all the nicks have disappeared. Move to a finer abrasive and hone the bevel at the same angle. For the sharpest possible edge, continue on through finer abrasives, polishing, then stropping the bevel. How can you tell when it’s time to move to a finer stone? Inspect the bevel — when the surface is an even color and texture with no dull areas or shiny spots, change to a finer grit.

sharpening the chisel bevel

4- As you sharpen, take care to preserve the profile of the blade — the cutting edge should be straight and perpendicular to the side. If you inadvertently grind a skew, you can easily correct it with some extra work and a judicious application of pressure.

skewed chesel

5- When you’ve finished the bevel, remove the burr that forms on the back. Turn the tool over and rub the back several times across the last abrasive used. Don’t remove the honing guide or change the angle of the tool rest. To remove the last vestiges of the burr, it often helps to take a few more licks on the last stone or strop, alternating between the bevel and the back. Test the sharpness by cutting a thin slice across the grain of a wood scrap. Any traces of the burr will leave tiny lines of torn fibers in the cut surface..

removing burr from back of chisel with sharpening stone
chisel icon

Back to Top